Creating a purchase request
The purchase request form includes the following tabs:
- Purchase Request Header - Includes fields for entering information about the purchase request, including the vendor, the purchase order number, the date the item or service is needed, and a description of the request.
- Line Item Detail - Includes fields related to entering the specific items related to the purchase request, such as the item number and description, the general ledger account assigned to the line item as well as model and manufacturer information.
NOTE: The purchase request fields described in this section may differ depending on how your organization has configured the purchase request form. Additional line item text entry fields or picklists may be available if enabled in the system for additional data capture.
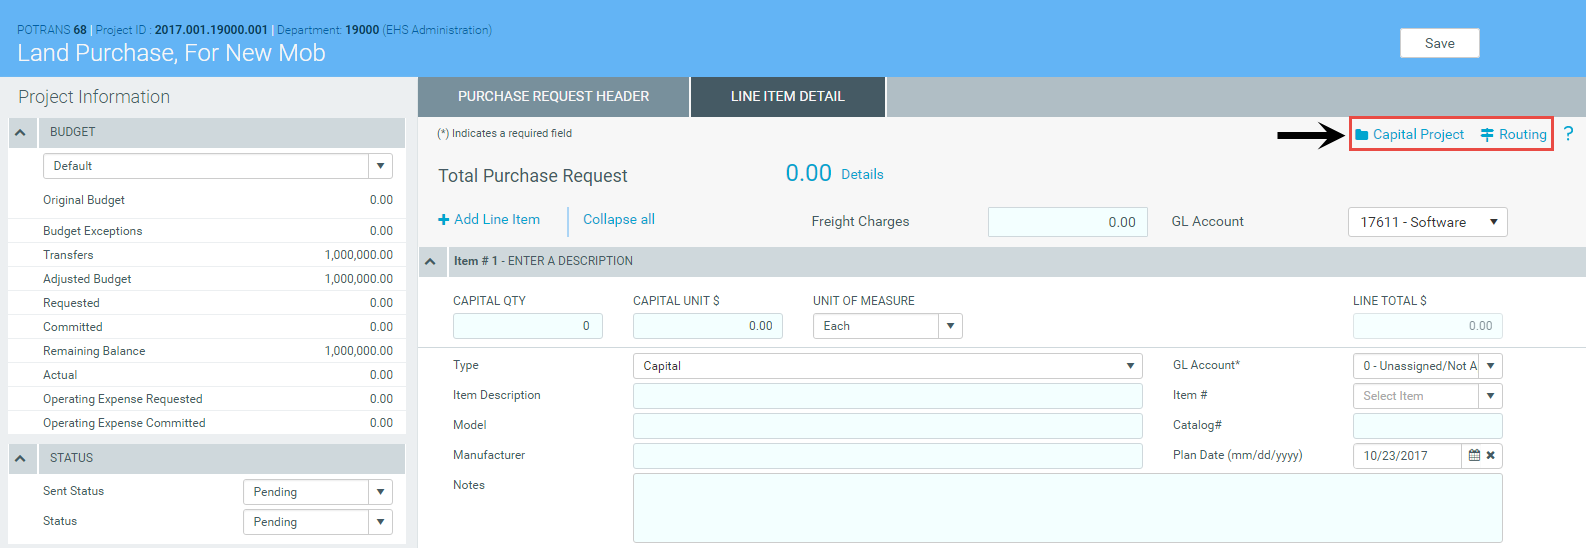
From each tab, you can view the plan file for the project by clicking Capital Project. You can also view the routing slip for the approval process by clicking Routing. Both of these links are at the top right corner of the page.
Click image to view full size
TIP: To enter a purchase request with more than ten line items, we recommend using the CT Purchase Request Import Utility. This utility allows you to enter a large number of line items using a single screen.
After a purchase request is created, users can search for it using the values in the following fields:
- POTRANS
- Purchase request ID
- PO number
- CAPREQ
- Request notes
To search for and open an existing purchase order request, see Opening a purchase request.
To create a purchase request:
-
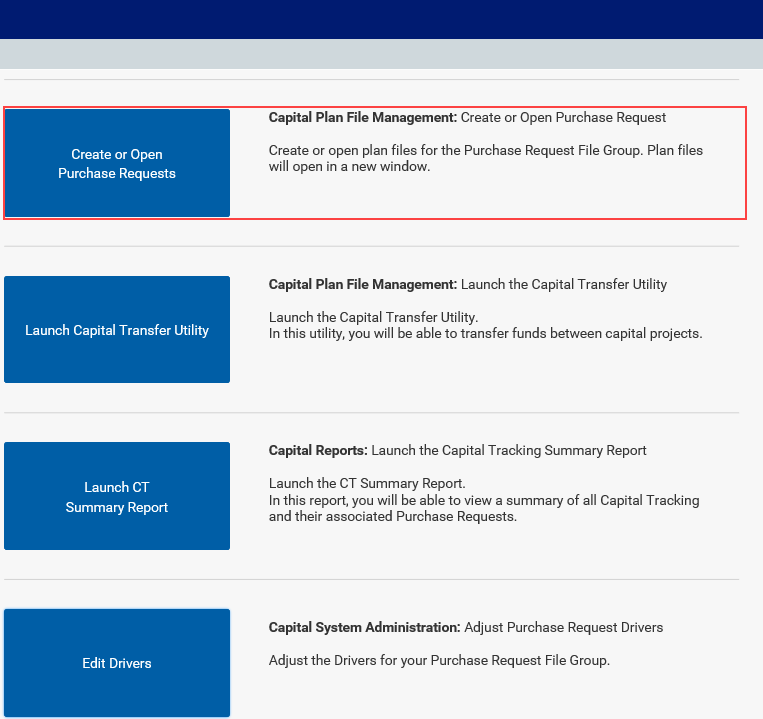
From the Axiom Capital Tracking home page, click Create or Open Purchase Requests.
NOTE: To access this location from the Cap Track or Cap Tracking Admin task pane, in the Capital Tracking Commands section, double-click Create Purchase Request.

Click image to view full size
-
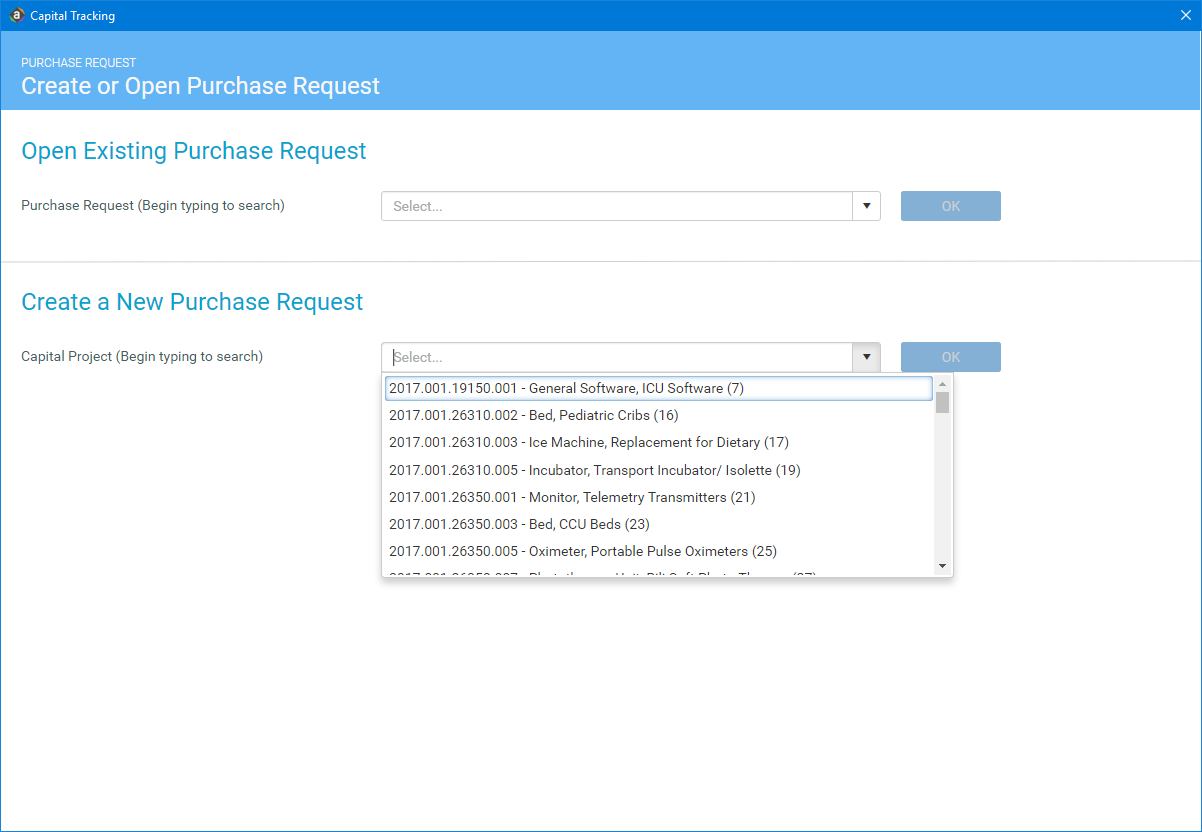
In the Capital Tracking dialog, in the Create a New Purchase Request section, from the Capital Project drop-down, select the approved capital project.

Click image to view full size
NOTE: You can also type in the field, and the system will automatically display capital projects that include those numbers or words in the project name.
- Click OK.
-
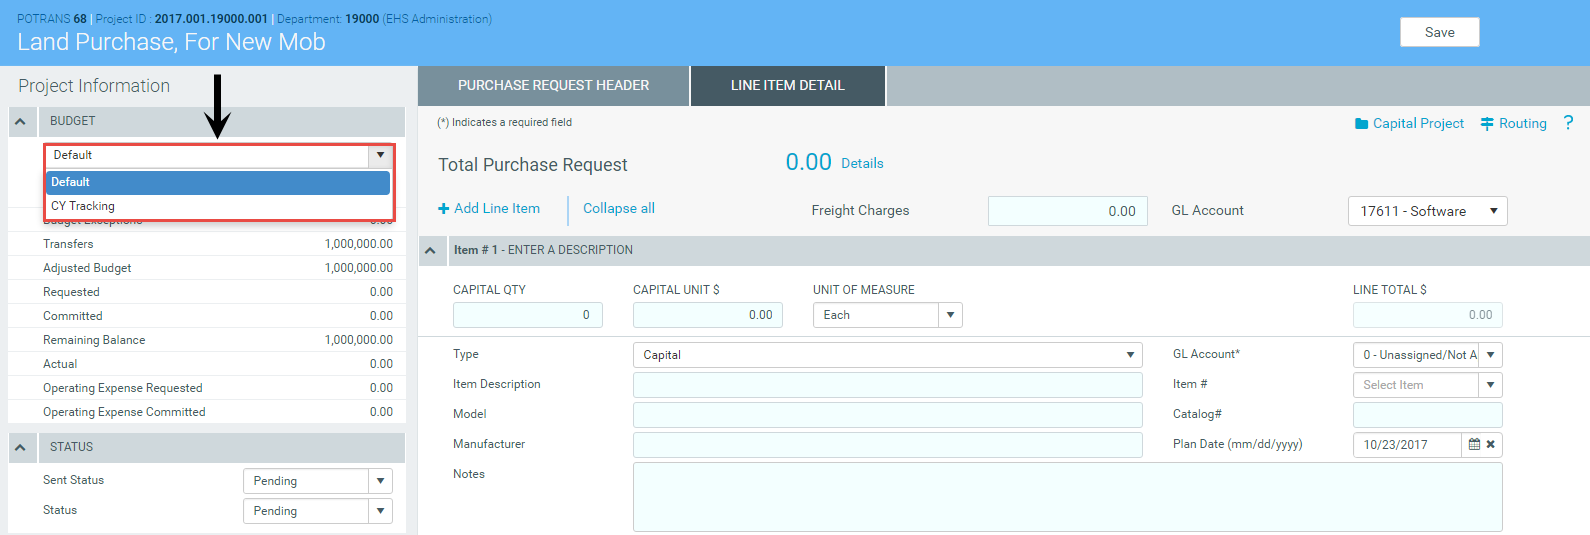
On the left side of the screen, in the Budget section, select the budget to view. You can view the entire budget for the project or only for the current year.
-
In the Purchase Request Header tab, complete the following fields, as applicable:
Option Description Purchase Request # Displays a unique purchase Request ID that the system automatically assigns for tracking purposes. Request Date Displays the date that the purchase request was created. This date is automatically assigned by the system. PO# Type the Purchase Order number.
NOTE: This field can only be edited by users assigned to the Capital Tracking Purchasing or Capital Tracking Admin roles. This field can also be sent back to Axiom after the PO is created in your organizations purchasing system.
Date Needed (mm/dd/yyyy) Select the date the item or service is needed. Request Notes Type purchase request header notes and a description. This is the default field used during workflow notifications. It should be a good descriptor of what the purchase is for the end users within the workflow. Attachment Notes Type supporting notes related to file attachments (if applicable). Vendor Select the vendor to use to fulfill the request. If a vendor was selected on the Axiom Capital Planning side for this project, then the vendor automatically displays. Deliver To Select the department to deliver the requested item or service to.
NOTE: Kaufman Hall can build a nightly feed from your source system to identify additional delivery areas as they become available.
Department Select the department in which the item or service is being requested. -
In the Line Item tab, complete the following fields, as applicable:
Option Description Freight Charges Type the amount charged for shipping and other freight charges associated with an item. GL Account Select the account to use for freight charges.
NOTE: The system displays a default account used by your organization for these types of charges.
Capital Qty Type the quantity needed. Capital Unit $ Type the amount of each unit. Unit of Measure Select the unit of measure for the requested item.
NOTE: Kaufman Hall can build a nightly import table for your organization, if needed.
Capital Tax Rate Enter the tax rate to use to calculate taxes (if applicable). Capital Tax $ Displays the tax rate for the entire capital cost of the request. This amount is automatically calculated by the system. Line Total $ Displays the Capital Qty multiplied by the Capital Unit $ plus Capital Tax Taxes (if applicable). This amount is automatically calculated by the system. Type Select the unit of measure for the line item. GL Account Displays the General Ledger account assigned to the line item, but you can change the default by selecting a value from the list. Item Description Type a description for the item. Item # Select the number associated with the item. This field is often re-purposed and not necessarily used from an item master your organization may have. Model Type additional Information related to the model of the item, if applicable. Catalog# Type the catalog number of the item, if applicable. Manufacturer Type the manufacturer of the item, if applicable. Plan Date (mm/dd/yyyy) Select the date that the line item is expected to be ordered.
NOTE: This may only be applicable if ordering line items at different times or setting up payment terms for a contract.
Department Select the department in which the item or service is being requested.
TIP: The department that displays in this field is the one originally selected in the Purchase Request Header tab, but you can change it here, if needed.
Notes Type additional notes needed to describe the line item, if needed. - To add an additional line item, at the top of the page, click + Add Line Item.
-
In the Status section, do any of the following:
- In the Sent Status field, select whether the purchase order is Pending or Sent for approval.
- In the Status field, select the status of the request: Pending, Approved, or Declined.
NOTE: You can only set the status if you have administrator or approver privileges.
-
When you are done making changes, in the upper right corner of the page, click Save.
NOTE: If the requested amount exceeds the current year or total budged threshold limit configured by your Capital Tracking administrator, the system displays a message and does not allow you to save the request.